Synchronize your 2FA Gmail with mbsync
In comparison to graphical email applications, configuring the command-line clients can be a needlessly painful experience. Not because of the client configuration itself but rather finding out the proper IMAP settings for your account. Personally, I spent more hours on moving my mail into Emacs (and previously into Mutt), than I care to admit. And in the end, it turned out that the only real obstacle was figuring out, how to get the freaking synchronization with Gmail working. Let me share my findings to potentially ease the pain for you.
TL;DR: Jump to the last section Gmail with 2FA
The obligatory intro on email clients
If you use, or ever tried to use some of the mainstream email clients such as Thunderbird, Evolution, Geary, or some mobile phone client (I am not a mobile phone nerd, so I don’t know any of them. I just have some Gmail thingy there), you might have formed an idea what an email client is supposed to do - download your messages, index them, filter them, and let you interactively work with them. And of course, allowing you to send messages as well. There is nothing groundbreaking about this, that’s just how we use email, and therefore what we expect email clients to do.
Command-line (or rather text-based) email clients do much less and
delegate a lot of work to a series of other small tools (aka the
Unix philosophy). Typically, we have a separate program for
simply downloading the mail from a server. There are many options, such as
mbsync from isync package, OfflineIMAP,
getmail, etc. Their only job is to download the mail and save it (one
message per file) to your disk. This can be useful on its own, e.g. for
backing-up your messages in case the email provider shuts down its business.
Optionally, it’s up to us to configure a spam filter either on the server-side (e.g. in Gmail settings) or on the client by using procmail, Bogofilter, or SpamAssasin. The next building block is indexing. This is generally not true for everybody but after years of countless mailing list subscriptions, many of us have our inboxes flooded with thousands or hundreds of thousands of messages. Directory-based storages just ain’t gonna cut it. We need some kind of a real database with indexes. For this, we can use tools like Mu, or Notmuch.
Finally, we are getting to the fun part, which is displaying, reading, and interacting with email. This is the most discussed and tutorial-covered link in the chain. And while exciting, and hacker-ish looking on screenshots, the configuration revolves mainly around color schemes and key bindings, which is quite intuitive and also not that big of a deal when using some default settings. Anyway, we can pick from the following frontends - Mu4e, Notmuch, Mutt, NeoMutt, Gnus, Alpine, and probably from a bunch of less-known clients as well. For sending email messages, one would expect to also utilize some specialized tool (and it certainly is possible) but usually, it is handled by the frontend program itself.
As you noticed, there is a lot of small, interchangeable utilities in play. Some of them optional, some of them even more optional. The categories I presented are not strictly defined and some tools overlap across multiple categories. It’s up to you to choose and put those lego blocks together and build your own email setup.
Today we are going to focus on the very first category, which is downloading
email messages to your computer. We are going to utilize mbsync command, and
we are going to set it up for your enterprise 2FA Gmail account. Since the
result is a bunch of downloaded files (which is not very impressive), and every
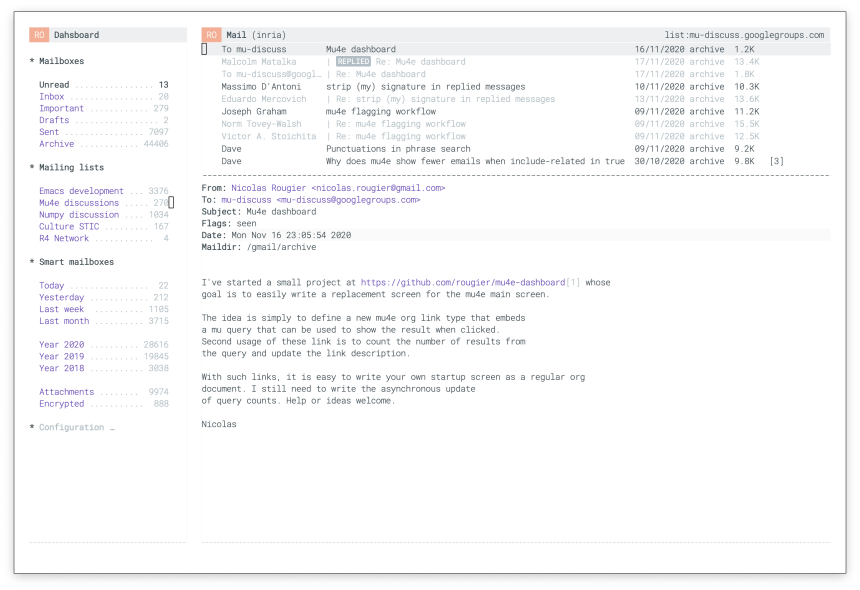
cool blog post should have at least one screenshot, I am going to jump a few
steps forward and show you how the end-game might look like once you manage to
successfully download your mail and open it in Emacs.

This beautiful configuration is not mine. The screenshot is taken from the rougier/mu4e-dashboard repository.
A less hostile provider than Gmail
First, please install the isync package, so we can get this out of our
way. Use the package manager provided by your GNU/Linux distribution, on
Fedora I would do
dnf install isync
Configuring multiple accounts in mbsync is trivial, and Gmail IMAP
is a mess. Therefore, I would recommend setting up an account from a different
email provider first (that is if you have the option) and learn how mbsync
works. Let’s create the ~/.mbsyncrc configuration file and insert the
following settings.
IMAPStore foo-remote
Host imap.foo.com
SSLType IMAPS
User frostyx@foo.com
Pass supercomplicatedpassword

MaildirStore foo-local
Path ~/Mail/foo/
Inbox ~/Mail/foo/INBOX
Subfolders Verbatim

Channel foo
Master :foo-remote:
Slave :foo-local:
Create Both
Expunge Both
Patterns *
SyncState *
A more complicated version of this snippet can be found on ArchWiki and countless blogs (1, 2, 3, 4, …), so I am not going to thoroughly describe the settings here. I would by paraphrasing the manpage anyway. Let’s just vaguely say, that the first section describes how to access your email account provided by some third-party. The second section describes how to store the downloaded messages on our computer. Finally, the last section configures what messages should be synchronized between those two, he said while pretending to understand it.
Replace all foo symbols in the snippet with some short label for your
email account (e.g. personal, work, test, …) and properly set the
Host, User, and Pass values in the first section. Then you
should be able to successfully run the following command
# Use the short email label you chose before
mbsync -V foo
There is not going to be any successful message in the output. Don’t panic,
seeing a bunch of Opening and Synchronizing... lines means that it works
fine. To make sure, list the mail directory
ls -1 ~/Mail
Because we don’t want to store our super-secret email passwords in
plaintext, we should stash them into some keychain and let mbsync how
to get them. Don’t even think about using the gpg command, that’s more
complicated than rocket science. Use pass instead!
# Initialize the keychain, you will run this just once in your life
pass init <gpg-id or email>

# Insert the password for your email account
pass insert email/frostyx@foo.com

# And print it to the terminal to make sure it was stored properly
pass email/frostyx@foo.com
This is all you need to know about pass (although it has some amazing
features such as storing passwords to git, which is worth checking
out). Now, remove the Pass line from your ~/.mbsyncrc config and
use this one instead.
PassCmd "pass email/frostyx@foo.com"
Make sure that mbsync -V foo still works, even when using a password from the
keychain.
Gmail IMAP sucks
Before moving to the Gmail configuration, I would like to make a disclaimer - Gmail IMAP support has limitations, idiosyncrasies, and to be scientifically precise, it just sucks. Please have patience.
- Each tag is stored as a folder, therefore messages with multiple tags will be downloaded multiple times (into each folder)
- The daily download limit is 2500 MB, so it may take several days for you to initially download your mail
- Your Gmail password will not work, an App Password is required
- Emails are visible in the web UI for a couple of minutes before they appear in IMAP. This is either an issue on my side or there is some delay
All of these are minor inconveniences, that can be workarounded, solved, or lived with. It’s just something to keep in mind.
Gmail with a plain password
Armored with bulletproof patience and unending determination, we
shall continue to mbsync configuration for Gmail. Now, if you think
“perhaps I should try a personal Gmail account without 2FA, it is going to
be easier”, please smother the idea in this instant. It is not
possible. Please repeat after me, it is not possible. I refused to
believe, tried over and over, failed miserably, over and over, and
ended up configuring 2FA anyway. Please save yourself the
time and the pain.
Log-in to your Gmail account and click to your profile picture in the top-right. Then continue to “Manage your Google Account”. In the left menu, click on “Security”, and turn on the 2-Step Verification.
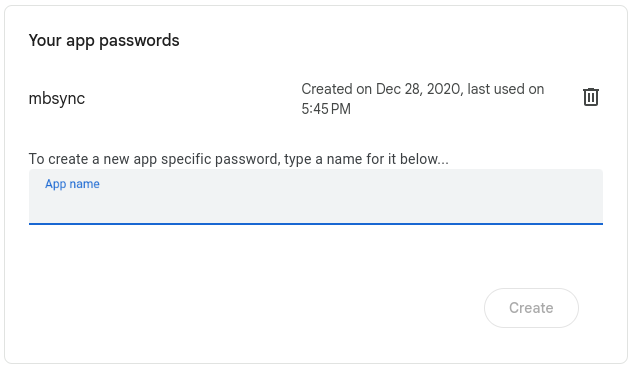
Now we need to generate an App Password. Click on “2-Step Verification”, then at the bottom of the page, you will find “App passwords” section. When opening it, you will see this.
Use whatever app name you want and click “Create”.
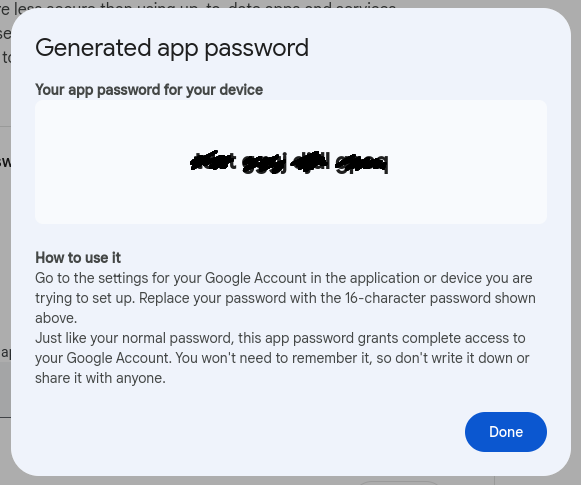
After closing this page, you won’t be able to display it again, so please write down the generated password. We will put it to the keychain in a minute.
Isn’t 2FA like a 2FA
Just a small digression in case you skipped the previous section because you already have 2FA configured. The Google documentation about App Passwords explicitly says:
App Passwords can only be used with accounts that have 2-Step Verification turned on.
The statement is correct but it can be a bit misleading. In fact, this happened to be one of the biggest pain-points for me. My corporate email uses Single-Sign-On authentication through Kerberos. The login page looks like this.
As you can see, my password consists of a PIN, which is a persistent passphrase, followed by a TOKEN - a randomly generated short string from a small device, that I wear in my wallet. In my view, this counts as a 2-Step verified account and should pass the constraint for using App Passwords. This is absolutely not true though. Please follow the same exact steps that we did in the Gmail with a plain password section.
Gmail with 2FA
We finally managed to jump through all the necessary hoops and
tweaked our Google account. Now we can get back to the mbsync
configuration. Let’s take the snippet from the
Less hostile provider than Gmail section
and make just a couple of changes.
IMAPStore gmail-remote
Host imap.gmail.com
SSLType IMAPS
AuthMechs LOGIN
User foo@gmail.com
PassCmd "pass email/foo@gmail.com"

MaildirStore gmail-local
Path ~/Mail/gmail/
Inbox ~/Mail/gmail/INBOX
Subfolders Verbatim

Channel gmail
Master :gmail-remote:
Slave :gmail-local:
Create Both
Expunge Both
Patterns * !"[Gmail]/All Mail" !"[Gmail]/Important" !"[Gmail]/Starred" !"[Gmail]/Bin"
SyncState *
The only fields that you need to modify are User and PassCmd. Your
password is the generated App Password that we transcribed from the yellow
stripe in the previous section -
Gmail with a plain password. Don’t forget
to stash it to the pass keychain.
pass insert email/foo@gmail.com


